2026 Best Stair Railing Kits for Easy Installation
Choosing among the 2026 best stair railing kits for easy installation requires more than comparing prices. A reliable kit should fit your staircase, support safe movement, and match the surface where it will be installed. Indoor wood stairs may need different brackets than outdoor concrete steps. Coastal homes also demand stronger corrosion resistance. Small details matter.
Mike Holmes, a veteran contractor and home improvement expert, often says, “Make it right.” That principle fits stair railing kits especially well. A railing can look attractive in its packaging, yet feel loose after installation. The best options include clear measurements, sturdy hardware, accurate templates, and instructions that ordinary homeowners can follow. They should also make adjustments possible when walls, stairs, or posts are not perfectly square.
This guide examines practical choices for different stair layouts, materials, and skill levels. We consider grip comfort, load stability, finish quality, drilling requirements, and installation time. We also look at real frustrations, including missing screws, unclear diagrams, and brackets that do not align cleanly. Some kits promise effortless installation. That promise is not always realistic.
Before buying, measure the railing length, stair angle, mounting surface, and available clearance. Check local building requirements as well. A kit may be easy to install but unsuitable for your specific staircase. Personal experience matters here. Even a careful homeowner can misread one measurement and create extra work. The goal is not merely a polished railing. It is a secure, comfortable, and dependable result that remains practical years later.
Types of Stair Railing Kits Available in 2026
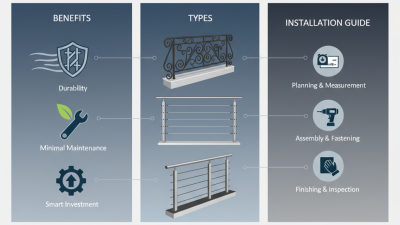
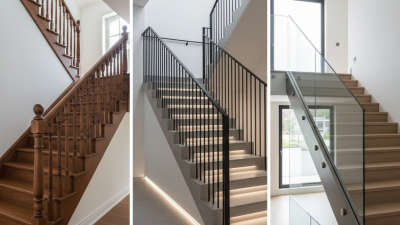
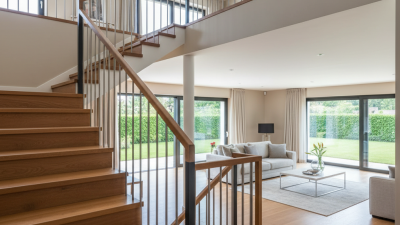
In 2026, stair railing kits come in several practical forms. Wall-mounted kits attach directly to a finished wall with brackets and a handrail. They suit narrow stairways and often require fewer floor penetrations. Post-to-post kits use newel posts, rails, and balusters for a traditional layout. They work well when the stair edge is open on one or both sides.
Cable railing kits create a light, modern appearance with horizontal stainless-steel cables. They need accurate tensioning, because loose cables can look uneven and feel unsafe. Glass panel kits provide clear sightlines, but the panels are heavy and demand solid anchoring. Wood and metal baluster kits remain useful for warmer or more industrial interiors. Adjustable systems can help with unusual angles, although their joints may look less refined.
I have found that modular kits simplify cutting, but they do not remove measuring work. Measure each tread, landing, and slope separately. A small angle error can become obvious near the bottom step. Check the substrate before choosing fasteners; drywall alone is not a reliable structural base. I once underestimated a landing transition and needed an extra connector. That mistake was avoidable. Review the installation guide, confirm local safety requirements, and inspect every connection after fitting. Some kits look simple. They still require patience.
Key Features of Easy-Install Stair Railing Kits
2026 Best Stair Railing Kits for Easy Installation
Easy-install stair railing kits should reduce measuring, drilling, and alignment problems. Adjustable brackets help the rail follow angled staircases without forcing awkward cuts. Pre-drilled components can save time, especially for homeowners using basic tools. A full hardware set is also important. Look for screws, anchors, washers, and clear spacing guidance in one package.
Good instructions should include diagrams, hole sizes, mounting heights, and weight limits. Templates are useful because small measuring errors become obvious on a short stair run. Materials should resist moisture, scratches, and daily hand pressure. Stainless hardware or properly coated steel usually performs better in humid areas. Always confirm the wall type before choosing anchors.
I once assumed a universal bracket would fit every staircase. That shortcut was a mistake. Some walls need different fasteners, and older steps may not be level. A reliable kit should allow minor adjustments after mounting. Check each connection by hand before use. Do not ignore local building requirements, especially for rail height, load strength, and openings. A careful test with steady pressure can reveal loose parts before regular traffic begins.
How to Choose the Right Kit for Your Staircase
Choosing the right stair railing kit begins with your staircase, not the product photo. Measure the total run, stair width, and railing height carefully. Measure twice. A kit should match your stair angle, available mounting surface, and preferred hand clearance. Straight stairs usually accept simpler systems, while turns and landings need adjustable fittings.
Inspect the installation area before ordering. Wood, concrete, and metal require different anchors and tools. Check whether posts can attach to solid framing, not just thin trim. The railing should feel firm when pulled from several directions. Follow the kit’s instructions and verify local building requirements for height, spacing, and load resistance. Small measurement errors can create visible gaps or an uncomfortable grip.
Tips:
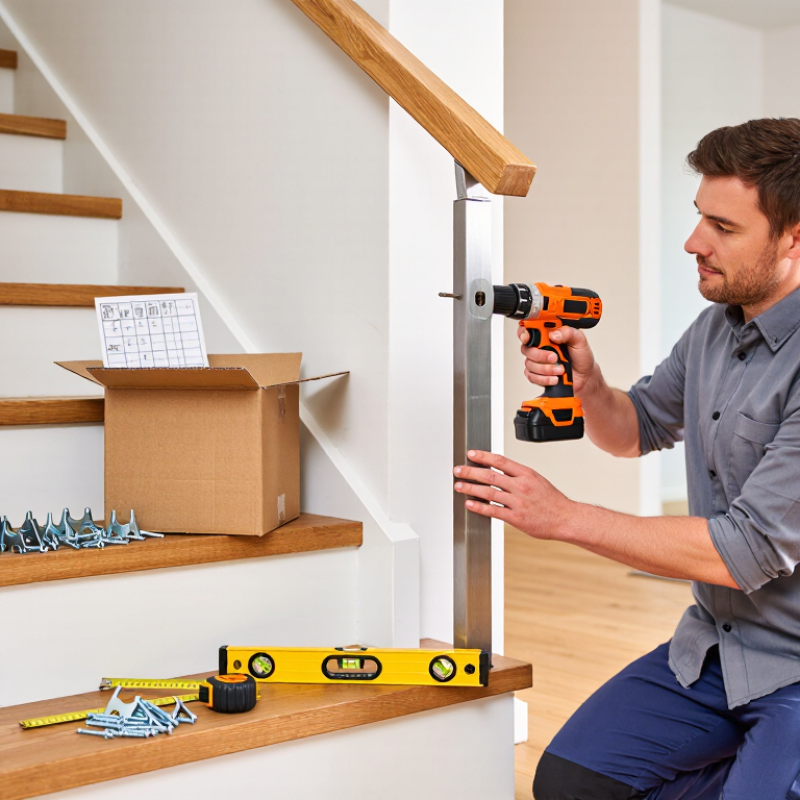
Draw your staircase on paper and mark every post location. Confirm the finished floor height, especially when new flooring is planned. Choose corrosion-resistant hardware for damp areas. Keep a drill, level, tape measure, and suitable bits ready. Do not guess. If the instructions seem unclear, pause and ask a qualified installer. I have found that “easy installation” often depends on accurate preparation, not speed. A nearly correct kit may still need extra brackets or modified spacing, so leave room for adjustments.
Step-by-Step Stair Railing Kit Installation Process
2026 Best Stair Railing Kits for Easy Installation
Step-by-Step Stair Railing Kit Installation Process
A stair railing kit simplifies the work, but accurate measurement still matters.
The CDC reports more than 8 million fall-related emergency department visits annually.
A secure handrail is not decoration; it is a practical safety system.
Measure the stair angle, total rise, and rail length before opening the box. Mark every wall stud with a level and stud finder. In the United States, the 2024 International Residential Code generally requires a handrail on stairs with four or more risers. It also specifies a typical height of 34 to 38 inches above the stair nosings.
Cut the rail only after checking both end clearances. I would leave extra length at first. Cutting twice feels wasteful, but replacing a short rail costs more. Attach brackets to structural framing, not only drywall anchors. Drill pilot holes to reduce splitting, then fasten the brackets firmly. Install the rail, keep it continuous, and test it with steady downward pressure.
Use a level across several steps. Small errors become obvious there. The National Safety Council’s Injury Facts identifies falls as a major source of preventable injuries, supporting careful installation rather than speed. Check local building requirements before drilling. Some stair layouts need additional support, and that is easy to miss in a quick weekend project.
Safety Checks and Maintenance After Installation
After installing a stair railing kit, do not trust a firm-looking surface. Grip each post and apply steady pressure from different angles. A slight twist can reveal a loose anchor or weak mounting point. Check every screw, bolt, bracket, and wall plug. The railing should not wobble, shift, or scrape against the wall. Run your hand along the full length. Sharp edges need immediate attention.
Measure the railing height and baluster spacing with a tape measure. Compare them with current local building requirements, especially in homes used by children or older adults. A kit can fit neatly and still fail a safety inspection. Check the stair nosings for uneven gaps, because loose footwear can catch there. Keep the walking path clear of tools, packaging, and protruding hardware.
Maintenance should be simple, but it is easy to postpone. Recheck fasteners after several weeks, then inspect them during seasonal cleaning. Wood may shrink or expand, while metal parts can develop rust near damp entrances. Wipe surfaces with a suitable cleaner and dry them fully. I would also repeat the pressure test after any wall repair or flooring change. Even careful installers miss small movement. If the substrate feels soft, stop tightening and seek qualified advice.
2026 Best Stair Railing Kits for Easy Installation: Safety Checks and Maintenance After Installation
This chart summarizes commonly used U.S. residential stair-railing reference dimensions. Confirm the requirements with your local building authority before installation, because codes may vary by jurisdiction.
After installation, check the handrail height, baluster openings, and wall clearance with a tape measure. Periodically tighten fasteners, inspect brackets and anchors for movement, check for cracks or corrosion, and confirm that the railing remains securely attached.