How to Choose the Best Sliding Door Hardware for Your Project?
Choosing the right sliding door hardware begins with the door itself. A lightweight closet panel has different needs from a heavy glass door opening onto a patio. Before comparing finishes, check the door’s weight, thickness, opening width, and available wall or ceiling space. A tape measure, a level, and the manufacturer’s load rating can prevent an expensive mismatch.
Architect Ludwig Mies van der Rohe is often credited with the phrase, “God is in the details.” He was not speaking specifically about sliding door hardware, but the idea fits: track alignment, roller quality, and soft-close components shape how a door feels every day. A door that glides quietly can make a room feel considered. A track that binds can quickly become a daily irritation.
This guide looks at the choices that matter: track style, roller design, material, finish, installation method, and maintenance. It also asks a practical question: who will install the system, and can the wall support it? Check the substrate, not just the visible trim. That detail is easy to overlook. Product descriptions can sound reassuring, yet measurements and real site conditions still need careful checking. Even a well-rated kit may not suit every opening. The best choice balances smooth operation, safe support, appearance, and access to replacement parts—not just the lowest price.
Define the Door’s Purpose, Size, and Operating Conditions
How to Choose the Best Sliding Door Hardware for Your Project?
Define the Door’s Purpose, Size, and Operating Conditions
Start by deciding how the door will be used. A pantry door opened a few times daily has different demands than a room divider that moves constantly. Note who will use it, how often it will travel, and whether quiet, gentle movement matters. Small details matter. Measure the door’s width, height, and thickness, then check its weight against the hardware’s rated capacity. A wide glass panel may need different support from a lightweight timber door. Also measure the available wall space and floor clearance; a track can be strong yet still leave too little room for the door to open fully.
Tips: Record the door’s measured weight, not just an estimate. Check the frame and mounting surface, too. Measure twice.
Consider the operating conditions before settling on a system. Humidity, dust, temperature changes, and exposure to splashes can affect hardware performance over time. A bathroom or utility area may need materials and finishes suited to damp conditions, while a dusty workshop may call for easier track cleaning. Check whether the door needs a floor guide, soft-close feature, or a lock, and confirm these parts work with the chosen setup. Not always. A feature that sounds useful may add cost or complicate installation without solving a real need. I’ve seen projects focus on appearance too early; a second look at daily use can change the choice. If the door is unusually heavy or the wall construction is unclear, ask a qualified installer to verify the load and fixing points before ordering.
Match the Hardware System to the Door Type and Material
Choose the hardware system around the door type, not just its appearance.
A single-panel interior door usually needs one track and a floor guide to limit sway. Bypass doors require paired tracks, so two panels can pass without colliding. For a patio door, check that the rollers and track suit frequent use and exposure to moisture. Small differences matter.
Material changes the requirements.
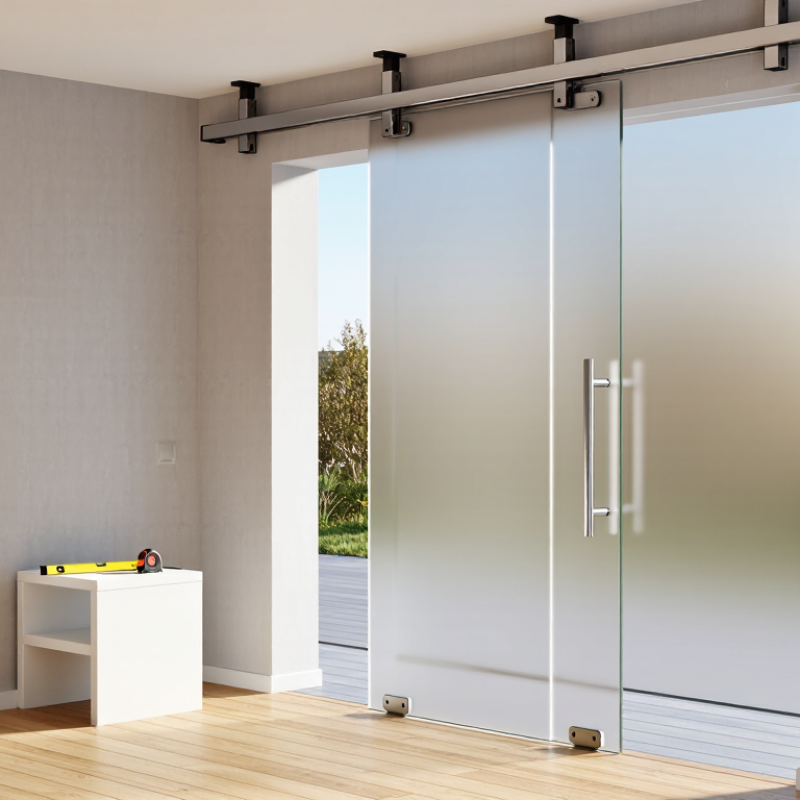
Solid wood doors are heavy, so compare their finished weight with the track and roller system’s rated capacity. Hollow-core doors are lighter, but their thin edges may not hold every fastener securely. Glass doors need compatible clamps or fittings; drilling glass on site is generally not a safe workaround. Check the panel thickness, edge clearance, and fixing method before ordering. A tape measure helps, but it cannot confirm the wall’s structure.
Look at the mounting surface, too.
Brick, timber framing, and drywall call for different fixings, and the track must be anchored into suitable support. I have seen careful measurements overlook the handle’s clearance; the door then catches near the wall. It is an easy detail to miss. Confirm the opening width, door overlap, and floor-guide position against the hardware instructions. If the door material or weight is uncertain, verify it before installation rather than guessing.
Check Weight Capacity, Track Design, and Required Clearance
How to Choose the Best Sliding Door Hardware for Your Project?
Check the door’s actual weight, including glass, trim, and attached handles. Choose hardware rated comfortably above that total, not just equal to it. The track, rollers, brackets, and fasteners must all support the load. A heavy door can strain weak framing, even when its rollers appear sturdy. Check the mounting surface before buying.
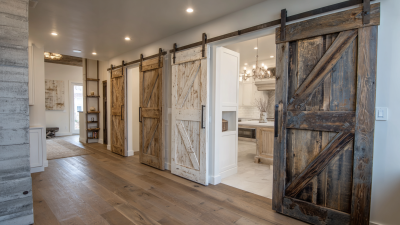
Track design affects daily use. Top-mounted tracks keep the floor clear, but need secure overhead support. Floor tracks can steady tall doors, though dust and grit may collect in the channel. Check whether the wall is straight and whether the door can clear nearby trim. Measure the full opening, handle projection, and space beside the doorway. Small details matter. I might still overlook a handle until installation, so mark its path on the wall before drilling.
Tips: Leave room for the door to slide fully open, and confirm the track length matches that travel. Compare the hardware’s stated capacity with your measured door weight. Measure twice. If the wall support or clearance is uncertain, pause and check the installation requirements before ordering.
How to Choose the Best Sliding Door Hardware for Your Project? - Check Weight Capacity, Track Design, and Required Clearance
| Hardware system |
Typical rated capacity per door |
Track design |
Key clearance to plan for |
Suitable project |
| Bypass closet doors |
About 50–100 lb (23–45 kg) |
Two parallel tracks let panels slide past one another. |
Allow space for the overlapping panels and top-mounted rollers; confirm the opening and track are compatible with the door thickness. |
Closets where a swinging door would take up floor space. |
| Single sliding barn door |
About 150–300 lb (68–136 kg) |
One exposed track above the opening; the door slides along the wall. |
A track is commonly about twice the door width for full opening. Check wall space, handle projection, floor gap, and any baseboard or trim interference. |
Interior rooms with clear wall space beside the opening. |
| Heavy-duty sliding door |
About 300–500 lb (136–227 kg) |
Reinforced track and larger rollers; may use multiple mounting points or a floor guide. |
Check the required structural backing, track length, roller clearance, and space for the full door travel. |
Large or solid interior doors and frequent-use openings. |
| Pocket door system |
About 75–200 lb (34–91 kg) |
A top track carries the door into a framed wall cavity. |
The wall must accommodate the pocket and framing. The rough opening is generally wider than the finished doorway to allow the door to retract into the wall. |
Rooms where a flush, space-saving doorway is desired. |
| Frameless glass shower door |
About 80–150 lb (36–68 kg) |
Corrosion-resistant overhead rail with glass-rated rollers and guides. |
Follow the specified glass thickness and panel overlap; allow for the shower enclosure layout, seals, and safe door travel. |
Shower enclosures designed for compatible tempered glass panels. |
| Multi-panel room divider |
About 100–250 lb (45–113 kg) per panel |
Single or multiple overhead tracks; panels may stack or move independently. |
Plan the stacking area, panel overlap, ceiling support, and unobstructed travel path. |
Room dividers and wide interior openings. |
Capacity and clearance figures are typical planning ranges, not universal specifications. Check the selected hardware’s published rating, door dimensions, mounting requirements, and installation instructions before purchase.
Compare Installation Methods, Safety Features, and Adjustability
Choosing sliding door hardware starts with the wall, ceiling, and door weight. Wall-mounted tracks suit many renovations, but their fasteners must reach solid framing or properly rated anchors. Ceiling-mounted systems can work where wall space is limited, provided the ceiling structure supports the load. Check the hardware’s stated capacity against the finished door, including glass or added panels. Measure twice. Even careful measurements can miss uneven floors.
Safety details matter in daily use. Anti-jump blocks help keep rollers seated if a door is lifted, while a floor guide reduces swinging at the bottom. End stops prevent the door from rolling off the track. Soft-close parts can reduce slamming, but they do not replace correctly sized hardware or secure installation. Keep clear of pinch points during testing, and confirm the door travels without scraping.
Adjustability makes installation more forgiving. Height-adjustable rollers can compensate for a slightly uneven opening, and movable stops let you set the final open and closed positions. Leave enough access to reach adjustment screws after the trim is installed. That detail is easy to overlook. Test the door slowly across its full travel, then recheck fasteners and clearances after repeated use. A small amount of rubbing may signal misalignment, not a defect in the door itself.
Select Durable Finishes and Plan for Maintenance
Choose a finish for the exposure, not just the sample in a showroom. Coastal air, de-icing salts, and frequent handling can wear down hardware differently. Salt changes the equation. For aluminum components, FGIA’s AAMA 2604 and 2605 specifications use five- and ten-year South Florida outdoor exposure benchmarks, respectively. These are coating-performance tests, not promises of service life. Ask suppliers which finish was tested and whether the test applies to the hardware’s base material. A polished sample can hide weak edges, screw heads, and contact points.
Plan maintenance before installation. Wipe tracks and exposed hardware with a soft cloth and mild, non-abrasive cleaner; grit can scratch a finish and obstruct rollers. Avoid harsh chemicals unless the manufacturer confirms they are safe for that coating. Check fasteners, drainage, and roller movement every few months, especially after storms or heavy use. Small checks matter. Record the finish type and cleaning instructions where the building team can find them. It is tempting to assume “corrosion-resistant” means maintenance-free; it does not. If the door faces salt spray, inspect more often and replace damaged seals promptly. A simple schedule may feel fussy, but neglected corners are often where deterioration begins.