| Wall Support |
The track must be anchored into structural studs, solid blocking, or a properly installed structural header. |
Locate studs with a stud finder and confirm their position with a small test hole or measurement from a corner. |
Do not rely on drywall anchors alone for a heavy or frequently used door. |
| Track Mounting Surface |
Use a continuous mounting board or header when stud locations do not align with the track holes. |
Check whether the mounting holes line up with at least two or more structural attachment points. |
A header distributes the load and helps keep the track straight. |
| Door Weight |
Choose hardware with a stated load rating above the actual door weight; a practical safety margin is at least 25%. |
Weigh the finished door, including glass, trim, mirrors, and other permanently attached parts. |
A higher load rating is needed for solid wood, thick panels, or oversized doors. |
| Door-to-Wall Clearance |
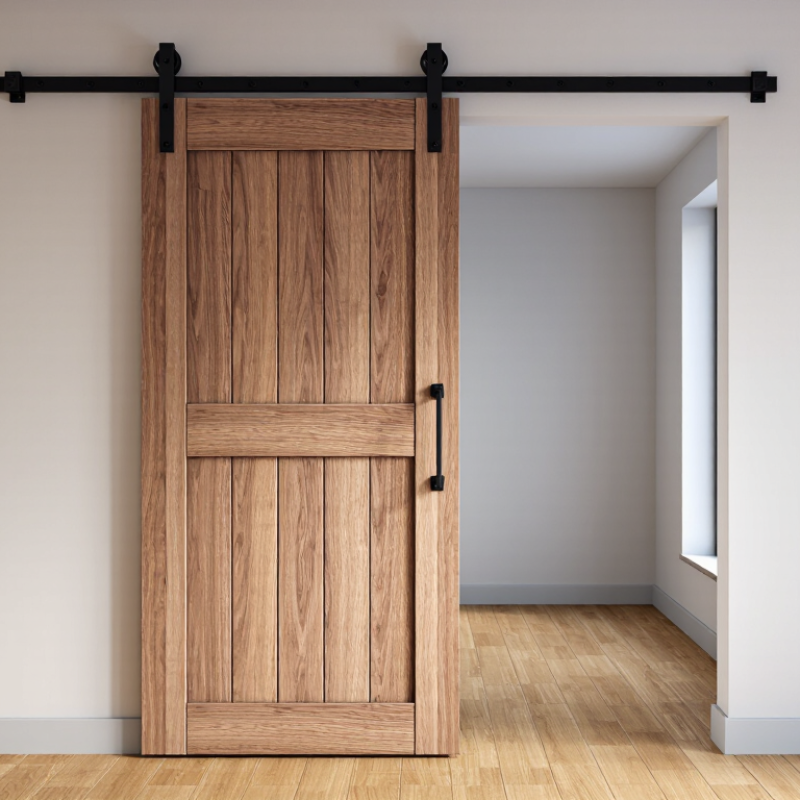
Allow approximately 1–2 inches between the door face and the wall or door casing. |
Measure from the finished wall surface to the door face after accounting for the track, rollers, spacers, and stops. |
Insufficient clearance can cause rubbing; excessive clearance can reduce stability. |
| Baseboard and Trim Projection |
The hardware must clear the thickest baseboard, casing, or wall molding along the sliding path. |
Measure the maximum projection from the wall, not just the thickness of the door casing. |
Use longer spacers or a deeper mounting header when trim projects into the door path. |
| Door Width and Opening Coverage |
The door should overlap the opening by about 1–2 inches on each side when privacy and light control are required. |
Measure the finished opening width, then compare it with the door panel width. |
Insufficient overlap may leave visible gaps around the opening. |
| Track Length |
For a single door, provide enough track for the door to clear the opening; a common planning rule is about twice the door width. |
Add the opening width, desired overlap, and the required parking space beside the opening. |
A short track may prevent the door from opening fully. |
| Headroom Above Opening |
Reserve enough vertical space for the door, roller assembly, track, mounting hardware, and the required clearance. |
Measure from the top of the opening to the ceiling or any obstruction. |
Limited headroom may require a lower-profile track system or a different door design. |
| Floor Guide |
Install a compatible floor guide to limit swinging and keep the door aligned with the track. |
Confirm that the floor guide can be fixed to the floor or wall without interfering with flooring or trim. |
The guide should match the door thickness and operating direction. |
| Track Level and Wall Condition |
The track should be mounted level on a reasonably flat, structurally sound surface. |
Use a long spirit level and inspect the wall for bowing, loose drywall, or damaged masonry. |
Uneven mounting can cause noise, uneven rolling, or unintended door movement. |
| Safety Stops and Anti-Jump Protection |
Use adjustable end stops and an anti-jump device suitable for the door’s weight and track design. |
Verify that stops can be tightened securely and that rollers cannot lift off the track during normal use. |
These components help prevent overtravel and accidental derailment. |
| Final Clearance Test |
The door should slide freely without contacting the wall, casing, floor, ceiling, or adjacent objects. |
Move the door through its complete travel range and check the 1–2 inch wall clearance at multiple points. |
Correct any contact or binding before regular use. |