Installing a modern barn door can transform a plain opening into a strong architectural feature. It also demands more accuracy than many homeowners expect. The track must carry the door’s full weight. The wall must support the hardware securely. Even a small alignment error can create scraping, vibration, or uneven movement.
Gary Katz, a veteran finish carpenter and door-installation educator, offers a practical standard: “A beautiful door still has to operate safely and squarely.” That principle guides this installation. Before opening the tool box, measure the doorway, surrounding trim, and available wall space. Check the door’s weight rating, track length, and recommended clearance. A modern barn door usually needs open wall space equal to the door’s width. That space cannot be blocked by switches, shelves, or nearby furniture.
Find the wall studs before marking the track position. If the fasteners miss solid framing, install suitable structural backing first. Keep the track level, even when the floor is not perfectly flat. Install the rollers carefully, then test the door with slow, controlled movement. Add the floor guide after confirming the door’s travel. It should prevent swinging without creating drag.
The first plan may be wrong. Recheck it.
Small details matter here. A handle placed too close to the edge can feel awkward. A door mounted too high may expose an unwanted gap. This guide explains the installation process clearly, while acknowledging that wall construction, door weight, and hardware design can change the final method.
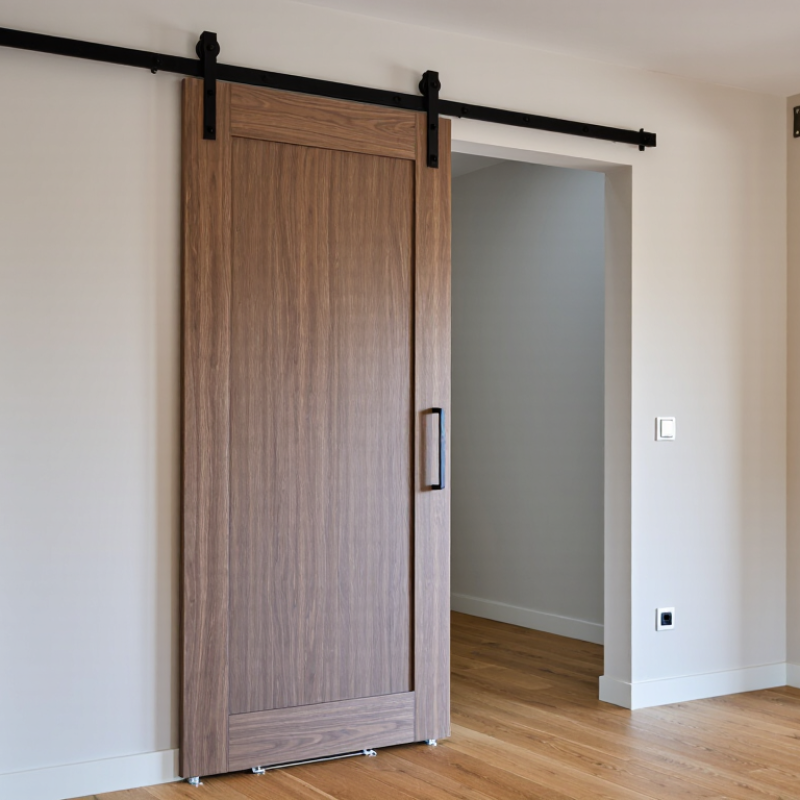
A successful barn door installation begins with the wall, not the door. Check whether the track can be anchored into solid studs or properly installed blocking. Drywall alone cannot safely carry a heavy door. Tap the wall, locate framing, and confirm the fastener positions before drilling. Leave enough wall space beside the opening for the door to slide fully clear. Light switches, outlets, trim, and nearby corners can quietly limit movement.
Measure the opening at the top, middle, and bottom. Walls are rarely perfect. Record the smallest width and height. The door should overlap the opening enough to reduce light and sound gaps, while still clearing the floor and trim. Check the track length, mounting height, door weight, and roller capacity together. A track usually needs room for the door to travel beyond the opening. Install the floor guide only after confirming the door hangs plumb.
Small details matter. Very much. I once focused on the opening width and missed a thick baseboard, forcing a hardware adjustment later. That mistake taught me to test the full swing path with cardboard or painter’s tape. Follow the hardware instructions for spacing and load limits, and inspect every anchor before hanging the door. If the wall framing is uncertain, ask a qualified contractor to evaluate it before installation.
How to Install a Modern Barn Door?
Before opening the wall hardware, gather every tool and material. You will need a tape measure, level, pencil, drill, bits, stud finder, wrench, and screwdriver. Keep a rubber mallet nearby for gentle adjustments. Prepare the door slab, track, rollers, spacers, mounting board, handles, floor guide, screws, and wall anchors. Confirm that each fastener matches the wall type. A screw for masonry may fail in timber framing.
Safety equipment matters during a short installation. Wear safety glasses when drilling and gloves when handling metal edges. Use hearing protection if power tools become loud. Clear the floor, secure the door upright, and ask another adult to help lift it. A modern door can look light but still strain your back. Check the opening width, available wall space, ceiling clearance, and nearby switches before drilling. I once measured only the doorway and missed the handle clearance. That small mistake delayed the work.
Tips: Locate solid studs before mounting the track. Mark their centers clearly. If the studs do not align, install a properly sized mounting board first. Hold the track against the wall and verify its level twice. A slight slope can make the door roll unexpectedly. Pre-drill holes to reduce splitting and keep the track straight. Do not trust included anchors without checking their load rating. Read the hardware instructions carefully, because spacing can differ between systems. If the door feels unstable, stop and reassess the support rather than forcing the final screws.
| Category | Item | Recommended Specification | Typical Quantity | Primary Use | Installation Check |
|---|---|---|---|---|---|
| Tool | Tape Measure | At least 25 ft (7.6 m), with clear inch and millimeter markings | 1 | Planning and layout | Measure the door opening, wall space, header position, and floor clearance twice. |
| Tool | Level | 24–48 in (610–1,220 mm) spirit level | 1 | Track alignment | Confirm the track is level before fully tightening the mounting hardware. |
| Tool | Stud Finder | Electronic or magnetic model suitable for locating wall studs | 1 | Wall inspection | Mark the centerline of every stud used to support the track or mounting board. |
| Tool | Drill/Driver | Cordless or corded drill with adjustable clutch | 1 | Fastening | Use the correct torque and avoid over-tightening screws into wood. |
| Tool | Drill Bit Set | Wood bits plus masonry bits when drilling into concrete or brick | 1 set | Pilot holes | Match the pilot-hole size to the fastener instructions and wall material. |
| Tool | Socket Set or Wrench | Metric and/or imperial sizes matching the supplied nuts and lag screws | 1 set | Hardware assembly | Verify that all nuts, bolts, and lag screws are snug without damaging the hardware. |
| Tool | Pencil and Marking Tool | Sharp pencil for finished surfaces; marker for concealed framing | 1 each | Layout | Mark track ends, stud locations, handle position, and floor-guide location accurately. |
| Tool | Clamps or Temporary Supports | Adjustable clamps or a support board capable of holding the track level | 2 or more | Track installation | Use temporary support while positioning the track; do not rely on one person to hold it alone. |
| Tool | Step Ladder | Stable, fully opened ladder rated for the installer and tools | 1 | Elevated work | Place the ladder on a level surface and keep both feet on the designated steps. |
| Material | Barn Door Panel | Door width should generally cover the opening plus about 2–4 in (50–100 mm) of overlap on each side | 1 | Door selection | Confirm the panel is structurally sound, flat, and compatible with the selected hardware. |
| Material | Sliding Door Track | Track length is commonly about twice the door width for a single door; follow the hardware instructions | 1 | Sliding mechanism | Leave enough wall space for the door to slide completely clear of the opening. |
| Material | Mounting Board or Header | Solid, straight timber sized to distribute the load across multiple wall studs | 1 | Wall reinforcement | Fasten the board into structural studs; drywall anchors alone are generally insufficient for a heavy door. |
| Material | Structural Fasteners | Lag screws or approved structural screws sized for the track, header, and wall construction | As specified | Load support | Use fasteners long enough to achieve secure engagement in the supporting structure without striking hidden utilities. |
| Material | Spacers or Standoff Hardware | Spacers that keep the track clear of trim and allow the door to travel freely | As specified | Track clearance | Check that the door clears the wall trim, baseboard, and handle throughout its travel. |
| Material | Rollers and Hangers | Load rating should exceed the fully assembled door weight with a reasonable safety margin | Usually 2 | Door suspension | Install both hangers evenly and confirm that the mounting bolts are fully seated. |
| Material | Anti-Jump Discs or Stops | Hardware designed to prevent the rollers from lifting off the track | As specified | Door retention | Test gently by lifting the door slightly; it should remain safely engaged with the track. |
| Material | Floor Guide | Adjustable guide compatible with the lower edge or channel of the door | 1 | Door stability | Position the guide so the door stays aligned without binding during opening and closing. |
| Material | Door Handle or Pull | Pull sized for comfortable grip and installed clear of the wall or door frame | 1 | Final hardware | Check that the handle does not collide with the wall, trim, or adjacent furniture. |
| Safety Equipment | Safety Glasses | Impact-rated eye protection with side coverage | 1 pair per person | Drilling and fastening | Wear during drilling, cutting, sanding, and overhead work. |
| Safety Equipment | Work Gloves | Protective gloves with a secure grip and suitable dexterity | 1 pair per person | Handling materials | Use when carrying the door panel or handling metal track edges; remove when operating rotating tools if required by the tool instructions. |
| Safety Equipment | Hearing Protection | Earplugs or earmuffs appropriate for power-tool noise | 1 pair per person | Power-tool operation | Use when drilling or operating other loud tools for extended periods. |
| Safety Equipment | Dust Mask or Respirator | Protection appropriate for the material being drilled, cut, or sanded | 1 per person | Dust-generating work | Follow the mask rating and material safety guidance for the door and wall materials. |
| Safety Equipment | Work Area Protection | Drop cloth, floor covering, and a clear installation zone | 1 set | Site preparation | Remove obstacles, protect finished flooring, and keep children and pets away from the work area. |
| Safety Check | Utility Inspection | Visual inspection and appropriate detector before drilling | 1 inspection | Before drilling | Do not drill where electrical wiring, plumbing, or other concealed services may be present. |
| Safety Check | Final Movement Test | Slowly open and close the door through its complete travel path | At least 3 cycles | Completion | Confirm smooth movement, secure hangers, working stops, anti-jump protection, and a stable floor guide. |
Before installing a modern barn door, measure the opening, wall, and floor carefully. Measure the opening at the top, middle, and bottom. Walls are rarely perfectly square. Use the smallest width for planning. Add at least 2 inches of door overlap on each side. Add 1 inch above the opening, unless the hardware instructions require more space.
The U.S. Access Board’s 2023 accessibility guidance identifies 32 inches as a common minimum clear door width. A barn door should not reduce a required exit opening below that dimension. Check local requirements before installation.
The 2024 International Residential Code also shows that header sizing depends on opening width, structural load, and span. Never assume drywall can support the track. Locate wall studs, then confirm the track length and fastener positions. If studs do not align, install a properly anchored mounting board across several studs. Solid support matters.
Keep the door bottom about 3/8 inch above the finished floor. Measure the floor, not just the subfloor. I recheck this point because flooring changes can create rubbing later. Leave enough side clearance for handles and fingers. A few millimeters can affect smooth movement. My first measurement may look correct, but uneven trim often tells a different story. Take photographs before covering the wall, and record every dimension for later reference.
Measure the opening and confirm the wall can support the track. A solid header or properly secured blocking is essential. I once trusted drywall anchors alone, and the track shifted after several days. That mistake taught me to locate every stud before drilling. Mark the track height, then check the level across its entire length. Even a small slope can make the door drift. Leave enough clearance for the door, floor guide, and handle.
Lift the track into position with another person. Heavy materials can twist unexpectedly. Use the correct screws and spacers for your wall structure. Tighten each fastener gradually, alternating between ends. This keeps the track straight instead of pulling one side upward. Attach the rollers to the door using the supplied hardware and verify that every bolt sits firmly. Hang the door carefully, then slide it across the track by hand.
Install the door stops after testing the door’s movement. Position each stop where the door covers the opening without striking the wall. The closing stop should prevent contact with the frame, while the opening stop should keep the rollers safely on the track. Add the floor guide and check that the door stays aligned during movement. Slide it repeatedly. Listen for scraping, rocking, or clicking. If something feels wrong, do not hide it with extra force; recheck the level, spacing, and fasteners.
A clean installation starts with the wall, not the door. I locate every stud and mark them with pencil. The mounting board must connect firmly with structural framing. A decorative surface cannot carry moving hardware safely.
The 2024 National Association of Home Builders Remodeling Market Index stayed above 50, showing continued remodeling activity. That growth also increases the need for careful, repeatable installation work.
Measure the opening, then allow the door to overlap both sides. Most modern systems need a track at least twice the door’s width. Follow the hardware instructions when the system specifies another measurement. Hold the track against the wall and check it with a long level. Even a small slope can make the door drift. I tighten fasteners gradually, moving from the center outward. That prevents the track from twisting.
Now hang the door and install the rollers, stops, and anti-jump guides. Leave practical clearance above the floor. Test the door slowly. It should travel smoothly without scraping, rattling, or lifting from the track.
The U.S. Department of Energy reports that air leakage can represent about 30% of a home’s heating and cooling energy use. A barn door is not an airtight seal, so avoid using it where ventilation control matters.
I recheck the fasteners after several test cycles. Sometimes the first alignment looks perfect. It is not always perfect.