Choosing the right stair railing can make a home feel safer, brighter, and easier to navigate. For many homeowners, indoor stair railing kits offer a practical path to a cleaner installation. These kits often include coordinated rails, brackets, fittings, and mounting hardware. That reduces guesswork during planning.
Still, convenience does not replace careful preparation. Before opening the package, measure the stair width, rail height, wall condition, and post locations. A pencil line, level, drill, stud finder, and measuring tape can prevent expensive mistakes. In my experience, the most frustrating problems often begin with one inaccurate measurement. Small errors become obvious when the final bracket sits slightly off-center.
Indoor stair railing kits can also help create a consistent appearance. Matching components may suit modern, traditional, or minimalist interiors. However, kit quality varies, and not every design fits every staircase. Buyers should review material specifications, weight guidance, installation instructions, and applicable local building requirements. Professional advice may be sensible when stairs have unusual angles, weak walls, or complex landings.
The process is simpler.
Yet it still deserves patience.
A reliable installation should feel firm under normal use, with smooth edges and secure connections. It should also support the household’s daily habits, including children, older adults, and guests. This guide examines why these kits are popular, where they save time, and where they may create hidden challenges. The goal is not to promise effortless results. It is to offer realistic guidance, based on practical details, product awareness, and a willingness to reconsider the first plan when the staircase proves less straightforward than expected.
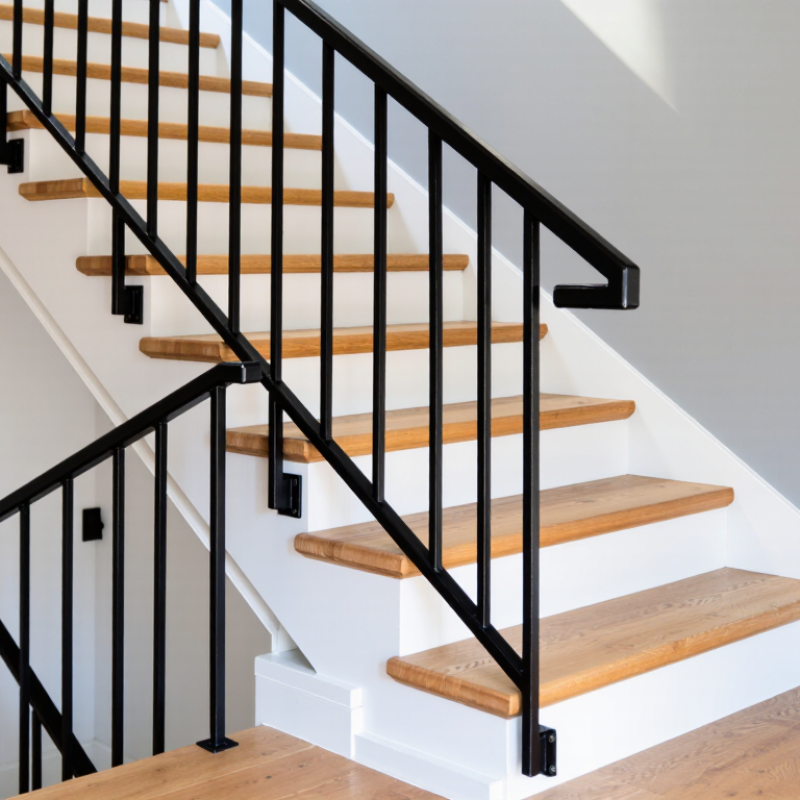
Indoor stair railing kits are designed around a simple assembly sequence: posts, handrails, balusters, brackets, connectors, and mounting hardware. Some packages also include a drilling template, end caps, and spare fasteners. Each part has a job. The posts carry the railing load, while brackets hold the handrail at a consistent height. Balusters close the open space between the steps and handrail.
I usually dry-fit every piece before drilling. It exposes awkward angles early. A typical kit uses pre-cut rails or adjustable connectors, so installers can match straight runs, landings, or turns without fabricating metal onsite. Screws anchor posts into structural framing, not just thin trim. That detail is easy to miss. The U.S. Consumer Product Safety Commission identifies stairs as a significant source of preventable home injuries, making secure attachment and correct spacing practical safety priorities.
The broader renovation market supports this demand. Harvard University’s Joint Center for Housing Studies reported approximately 472 billion dollars in U.S. homeowner improvement spending during 2022, showing how common small upgrade projects have become. Yet convenience can create overconfidence. Parts may fit together quickly, but walls, flooring, and stair angles are rarely perfect.
Measure twice. Check every connection. Follow the supplied instructions and local building requirements, especially for handrail height, baluster spacing, and structural anchoring.
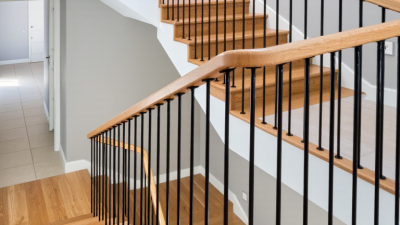
Indoor stair railing kits can simplify installation, but accurate measuring still matters. The 34–38-inch handrail height standard is a practical starting point for residential stairs. Measure vertically from the stair nosing line to the top of the handrail. Do not measure from the tread surface alone. That small mistake can create an uncomfortable, uneven result.
Use a tape measure, level, pencil, and angle finder. Mark the nosing line across several steps, then extend it along the stair slope. Measure 34–38 inches upward at the planned mounting points. Check the first step, middle steps, and final step. Landings may require separate measurements. Keep the rail height visually consistent. A level helps, but it cannot replace careful geometry checks.
I once measured only the top and bottom steps. The middle bracket sat slightly low. It looked acceptable from a distance, yet felt awkward by hand. That experience changed my process. I now confirm wall angles, post positions, and clearance before drilling. Indoor kits often include compatible brackets and fasteners, but the wall structure must still support them. Drywall alone is not enough. Verify local building requirements, especially for returns, extensions, and stair openings. A second person can hold the rail while you test reach and alignment. It takes longer, but prevents avoidable holes.
Use this measurement guide to record stair geometry before selecting and installing an indoor stair railing kit. Dimensions are shown in inches, with metric equivalents where useful.
| Step | Measurement | Reference Dimension | How to Measure | Installation Relevance |
|---|---|---|---|---|
| 1 | Handrail height |
34–38 in 864–965 mm |
Measure vertically from the stair nosing line to the top of the handrail. Keep the tape measure plumb rather than measuring along the stair slope. | A target height of 36 in provides a practical midpoint within the commonly used residential range. |
| 2 | Stair width | Confirm the locally applicable minimum; many residential references use approximately 36 in clear width. | Measure horizontally between finished wall surfaces, newel posts, or other permanent obstructions at the narrowest point. | A 42 in wide stair can accommodate a railing while retaining usable walking space, subject to local requirements. |
| 3 | Riser height |
Common residential reference: maximum 7.75 in 197 mm |
Measure vertically from the top surface of one tread to the top surface of the next tread. Check several risers for consistency. | If one riser measures 7.5 in and another measures 8.0 in, the variation may create a trip hazard and should be reviewed before installation. |
| 4 | Tread depth |
Common residential reference: minimum 10 in 254 mm |
Measure horizontally from the leading edge of one tread to the leading edge of the next, excluding the nosing overhang when applicable. | A 10.5 in tread gives approximately 0.5 in more foot placement than a 10 in minimum reference. |
| 5 | Nosing projection |
Often limited to about 1.25 in maximum 32 mm |
Measure the horizontal projection from the vertical face of the riser to the front edge of the tread nosing. | Record the nosing position so brackets and rail supports do not interfere with the walking line. |
| 6 | Stair angle | Calculate from total rise and total run; many comfortable residential stairs fall near 30–37 degrees. | Use the formula: angle = arctangent(total rise ÷ total horizontal run). A digital angle finder can provide a direct field check. | A stair with a 90 in total rise and 120 in total run has an angle of approximately 36.9 degrees. |
| 7 | Rail length | Cover the full accessible stair run and required extensions, if applicable. | Measure along the pitch line from the planned lower termination to the planned upper termination. Add extra length only when the selected kit allows it. | A 12-tread straight flight with a 10.5 in tread depth has an approximate horizontal run of 126 in before accounting for landings or extensions. |
| 8 | Handrail clearance |
Common reference: minimum 1.5 in 38 mm between the handrail and adjacent wall |
Measure from the nearest point of the wall or obstruction to the closest point of the handrail. | A 2 in clearance generally provides more comfortable hand access than a 1.5 in minimum reference. |
| 9 | Handrail graspability | Circular handrails are commonly designed within approximately 1.25–2 in outside diameter. | Measure the outside diameter or cross-section of the rail and confirm that the profile can be gripped securely. | A round rail measuring 1.5 in in diameter is within the commonly referenced graspable range. |
| 10 | Post and bracket locations | Place supports at structurally sound attachment points and within the kit’s permitted spacing. | Mark the top and bottom termination points, locate wall studs or structural framing, and verify that each fastener position is supported. | On a framed wall, align brackets with studs whenever possible instead of relying only on drywall anchors. |
| 11 | Landing and termination space | Maintain the required walking clearance at the top and bottom of the stairs according to local regulations. | Measure the available landing depth and width after accounting for doors, trim, light switches, and adjacent circulation paths. | A railing that extends into a doorway swing or narrow landing may require a different termination position. |
| 12 | Code and site verification | Local building codes and existing-stair conditions control the final design. | Compare the recorded dimensions with the applicable residential code, permit requirements, manufacturer instructions, and structural conditions. | Treat the 34–38 in handrail range as a planning reference, not a substitute for jurisdiction-specific approval requirements. |
Planning note: The dimensions above are commonly used residential reference values. Building codes vary by jurisdiction, stair type, occupancy, and project date. Verify the final handrail height, guard requirements, clearances, fastener locations, and landing dimensions with the applicable local authority before installation.
Indoor stair railing kits can make a difficult upgrade more manageable. The real decision begins with the profile, not the decorative finish. A graspable diameter between 1.25 and 2 inches usually offers a secure handhold. It also aligns with commonly referenced accessibility dimensions. Requirements vary by location, so confirm the applicable code before ordering. Measure the outside diameter, not the label alone. Small differences matter.
During installation, place a sample section in your hand. Does the palm close comfortably without stretching? Can fingers wrap around it while moving down the stairs? A round or gently shaped profile often feels more predictable than a sharp, oversized rail. The kit should include compatible brackets, fasteners, and clear instructions. Still, hardware cannot correct weak framing. Locate studs or use an approved structural fixing method. This is where quick projects become careful projects.
Check the rail height, wall clearance, and return ends before tightening every screw. A return that stops abruptly may catch clothing or feel unfinished. Keep the graspable section continuous where practical. Cut once, then test the fit. That habit prevents wasted material. I would also recheck the diameter after applying paint or a sleeve. Added layers can reduce comfort and change the measured result. A neat fit can still feel wrong if the handhold is too large.
Indoor stair railing kits can simplify installation, but convenience should never replace careful load verification. A properly fitted handrail must resist a 200-pound force without loosening, excessive movement, or pulling from its mounting surface. That force is not supported by the rail alone. Brackets, screws, blocking, and the wall structure must work together.
Measure twice. Fasten once.
Before drilling, locate solid framing or install suitable structural blocking. Drywall anchors may look secure during installation, yet they can fail under repeated pressure. Test the rail with controlled body weight, not a sudden jump or violent pull. The 200-pound figure is a verification target, not permission to ignore local building requirements. Requirements can vary by location and stair design. Check the current guidance that applies to your project.
Guard openings require equal attention. A 4-inch sphere should not pass through protected areas, especially where children may climb or reach. Measure the widest clear gap between balusters, rails, and nearby stair surfaces. Uneven floors can make an opening appear compliant at one point and unsafe at another. That detail is easy to miss.
Kit instructions also deserve close review. Confirm the included hardware matches your wall or stair material before assembly. A clean appearance can hide weak attachment. One practical improvement is adding a final inspection after several days of normal use. Fasteners may settle. Rails may develop slight movement. If anything shifts, stop using the stairs until the cause is corrected. My own checklist is not perfect, but it catches more problems than visual inspection alone.
Indoor stair railing kits make home installation more manageable because the main parts are prepared to work together. They often include rails, brackets, fasteners, and basic instructions. Still, every staircase has different wall materials and spacing. Measure the stair run, mounting height, and stud positions before drilling. My first dry fit looked straight, but one bracket sat slightly high. Small errors become obvious under bright hallway lights. Mark carefully.
Install the brackets on solid structural points, not only on thin wall covering. Use a level during every adjustment. Hold the rail in place and check its distance from the wall and stair edge. The rail should feel firm without shifting when pressed from different angles. Tighten fasteners gradually. Over-tightening can damage softer materials or distort a bracket. Leave room for a second check.
Inspect each connection after installation. Run your hand along the rail and feel for movement, sharp edges, or rough cuts. Look at every screw head, bracket joint, and end cap. Walk up and down the stairs slowly, using the railing as an ordinary person would. Ask another adult to test it too. A second viewpoint can reveal a slight tilt you stopped noticing. If the wall feels weak, pause and seek qualified advice before continuing. Recheck the alignment after several days, because settling or repeated use may expose a problem that was not visible on installation day.